The opportunities for creating artworks and decorative objects with pressed flowers are endless. Once you start to experiment, we have no doubt that you will come up with all sorts of ideas for how to create unique pieces with your pressings. The projects over the next few pages will give you some ideas to get you started using just a handful of basic materials. And remember, no two flowers are the same and nobody else will create what you create–embrace the idea that everything you make will be completely unique.
Letters
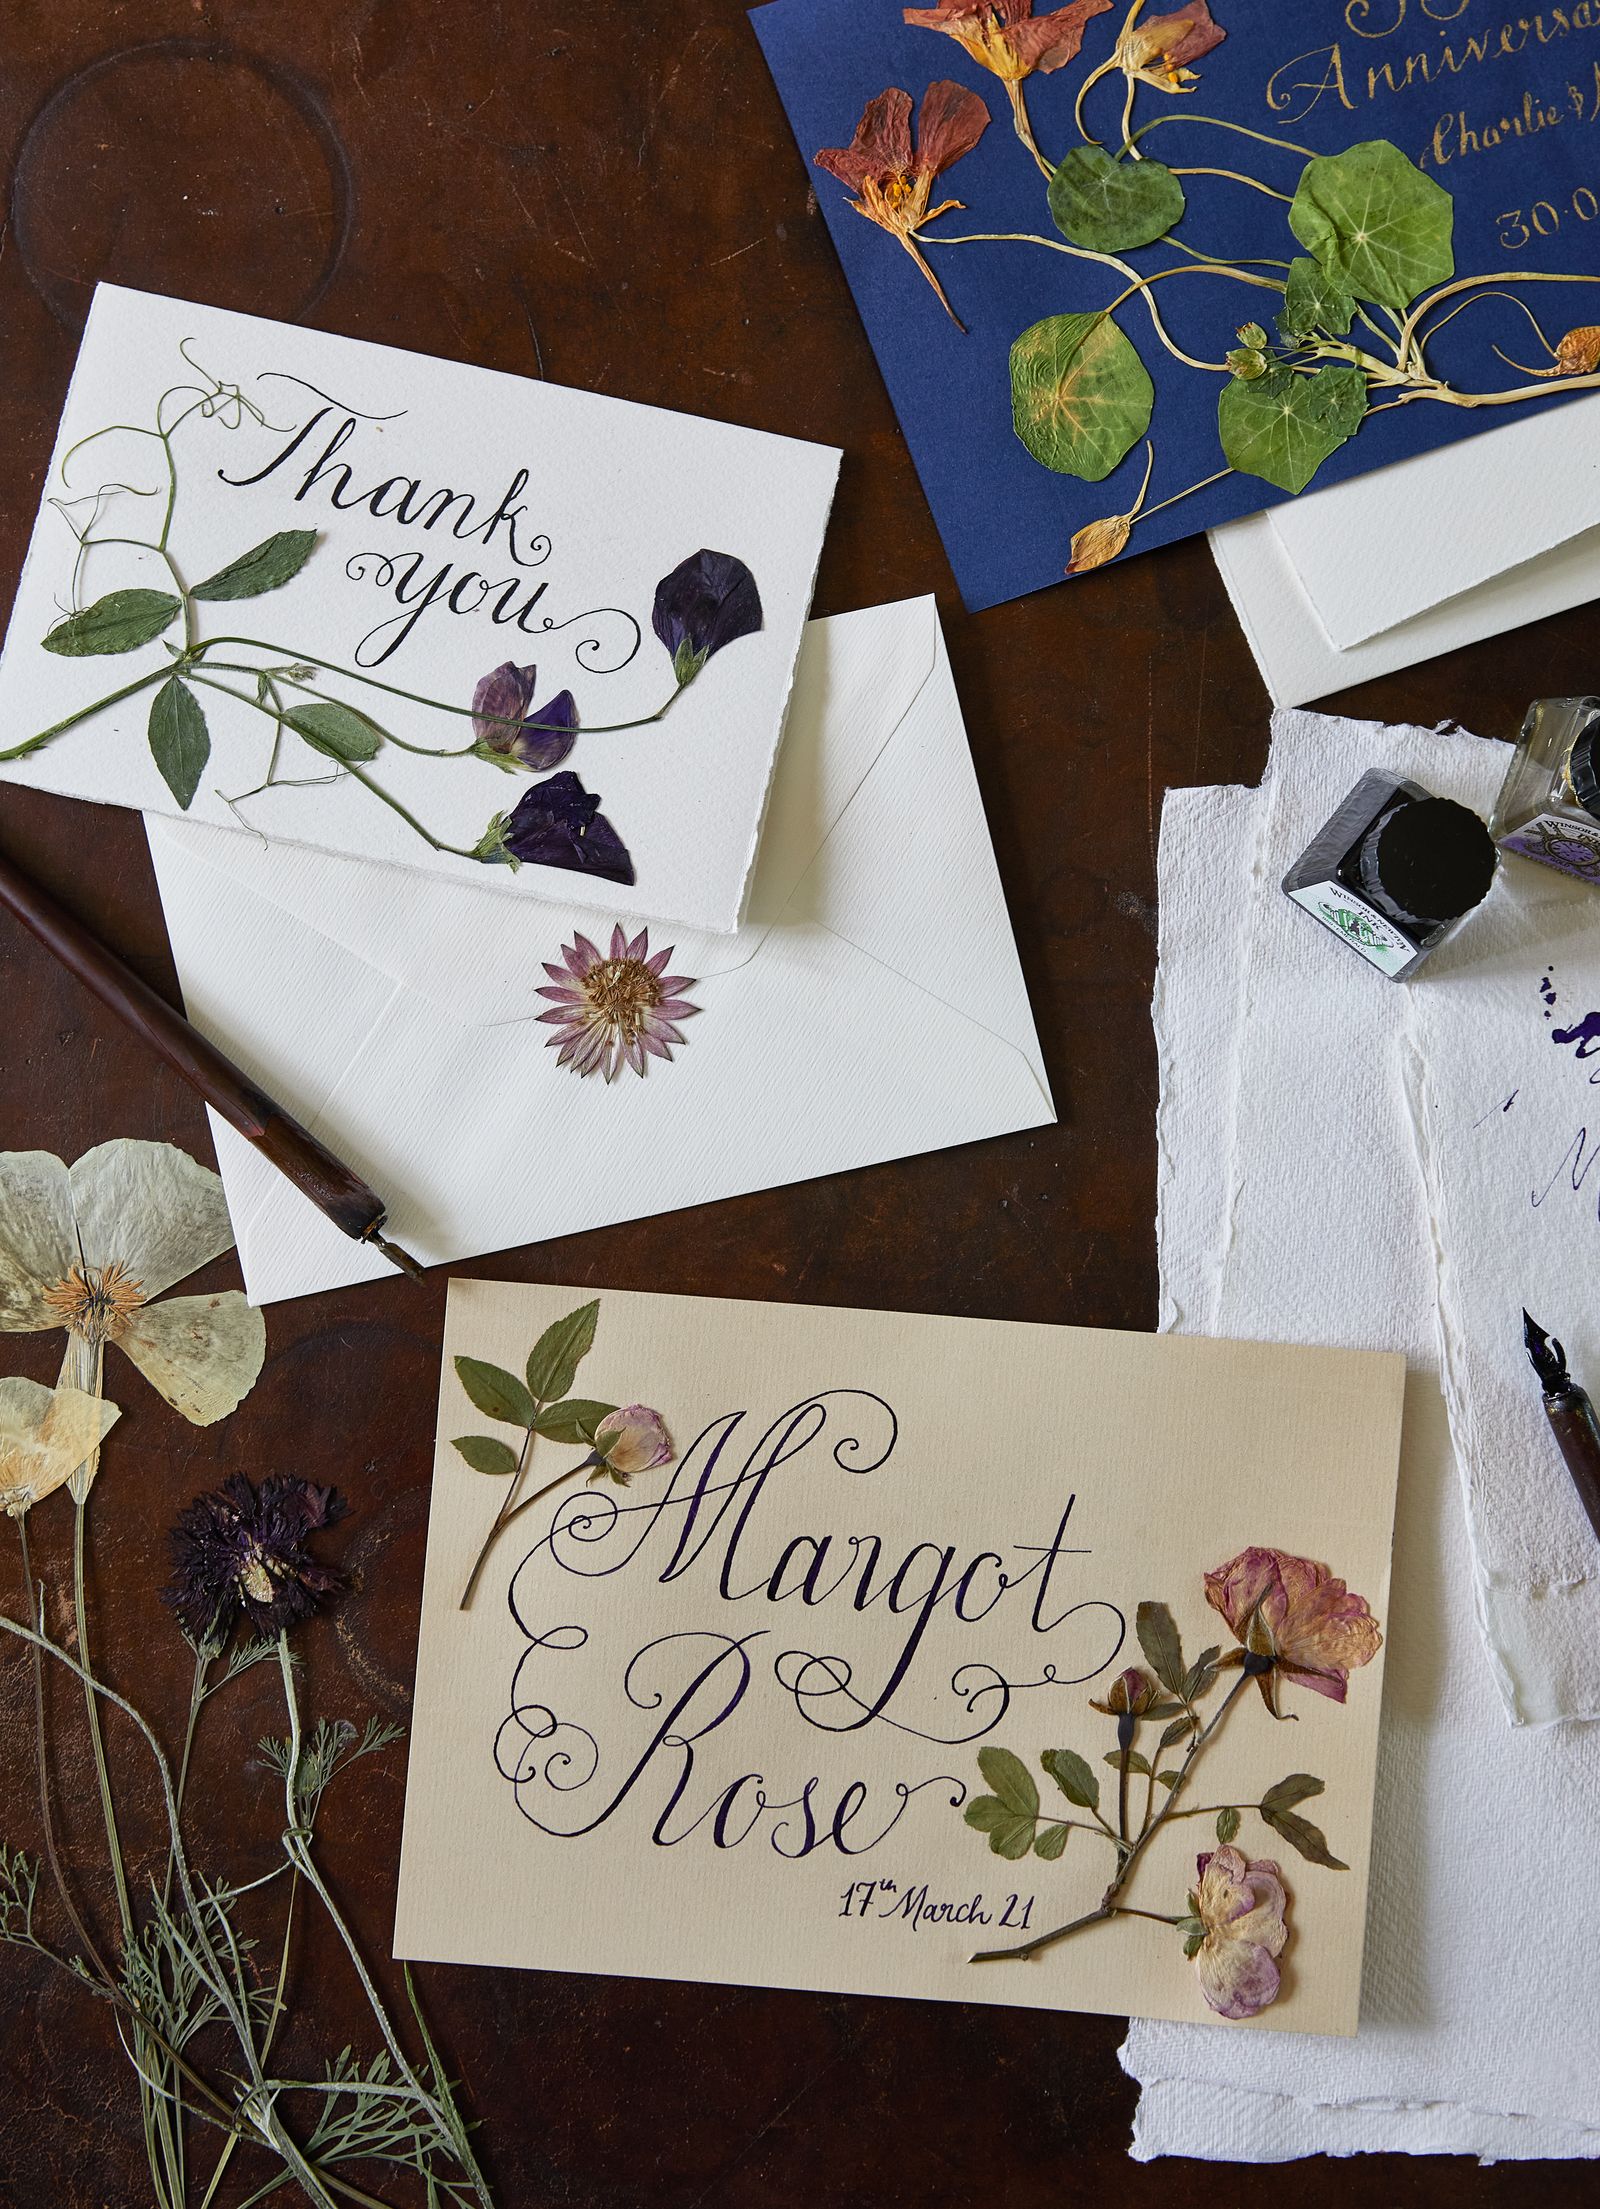
One of the best marriages of two crafts is pressed flowers and calligraphy. Using a pressed flower to personalise a letter, to celebrate the birth of a child or mourn the loss of a loved one, is a lovely way to create a lasting memory. The next time you’re passing an art supplier or stationery shop, pick up a few different papers and ink colours to experiment with. Often it’s the tiny details that have the most lasting impact. Try simply fixing a single flower head to the back of an envelope once you have sealed it. This little gesture will go a long way.
Always lay out your flowers first to decide where your text is best placed, then sketch in pencil before applying ink to paper. There is no right or wrong way, but embrace the natural shape of the flowers you’re working with and play around with the spacing. Apply a thin layer of clear glue to the back of the flower head, the stem, and any leaves using a fine paintbrush, then position where you want it to go. Leave for twenty-four hours for the glue to become touch dry.
Tip: If you feel your handwriting isn’t up to scratch, it might be worth investing in taking a calligraphy course—you will be amazed at the difference it can make.
Gift wrapping
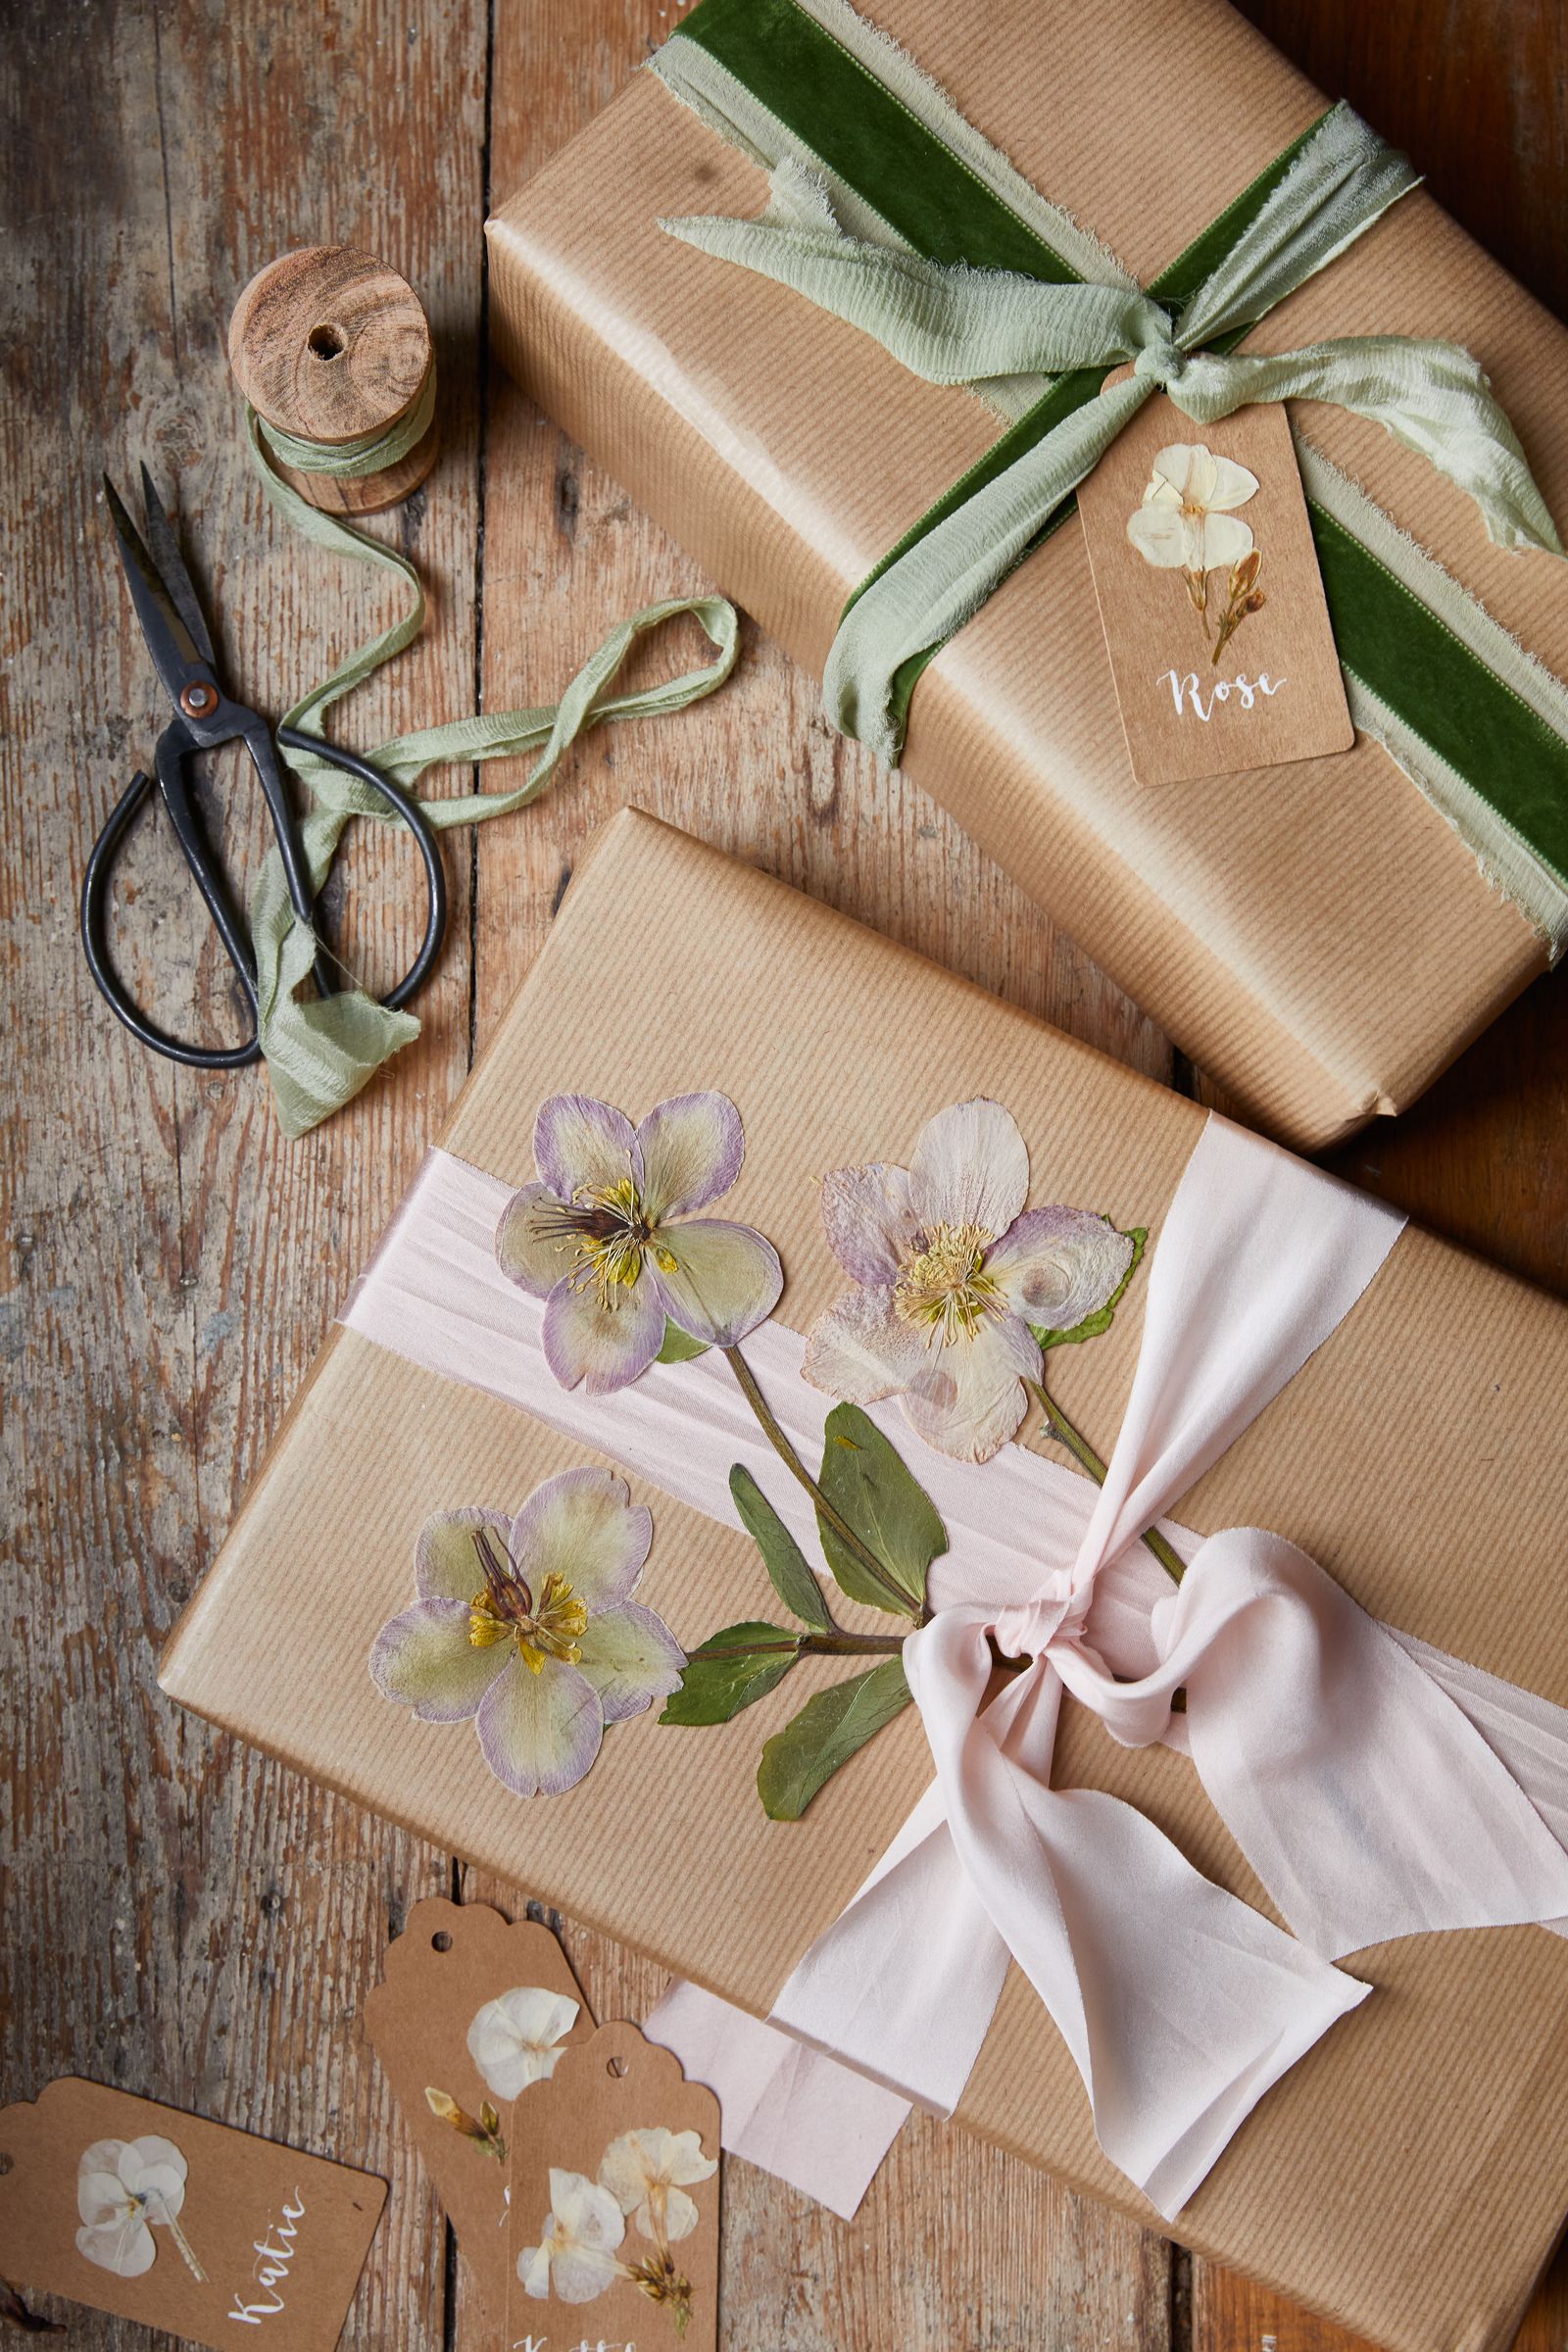
A little bit of extra effort when it comes to wrapping gifts always goes a long way. Paper can be plain-classic brown craft paper is a perfect blank canvas for any occasion and can be transformed into something glorious once you’ve had a rummage in your kitchen drawer for offcuts of ribbon or colourful string.
Layer silk and velvet ribbons around a plain gift box, tuck-ing in long-stemmed pressed flowers in a complementary colour, or attach pressed flowers to plain wrapping paper with glue or tape to create your own unique gift wrap.
Glue individual pressed flowers onto paper gift tags leaving space at the bottom for a name; add a tiny strip of mask-ing tape across the stem of the flower for extra security, if needed. This is a smart way of fixing tiny stems down if it feels too fiddly to use glue.
Napkins

Place a single pressed flower onto a freshly ironed linen napkin at each place setting. You can secure it using a ribbon tied around the napkin if dining outside, or tuck it into a fold in the napkin. Think about the season–violas, geum, and narcissi are perfect for a spring table; delphiniums, sweet peas, and cosmos for a summer dinner party; or hellebores in deep plum and white at Christmas. I did this for each guest at my own wedding instead of favours, which we felt were a bit unnecessary; mostly orange geums, chocolate cosmos, and yellow daisies tucked into each napkin. Throughout the day it was lovely to notice them popping up from suit pockets, tucked into friends’ hair, and scattered around empty glasses on tables.
Coasters
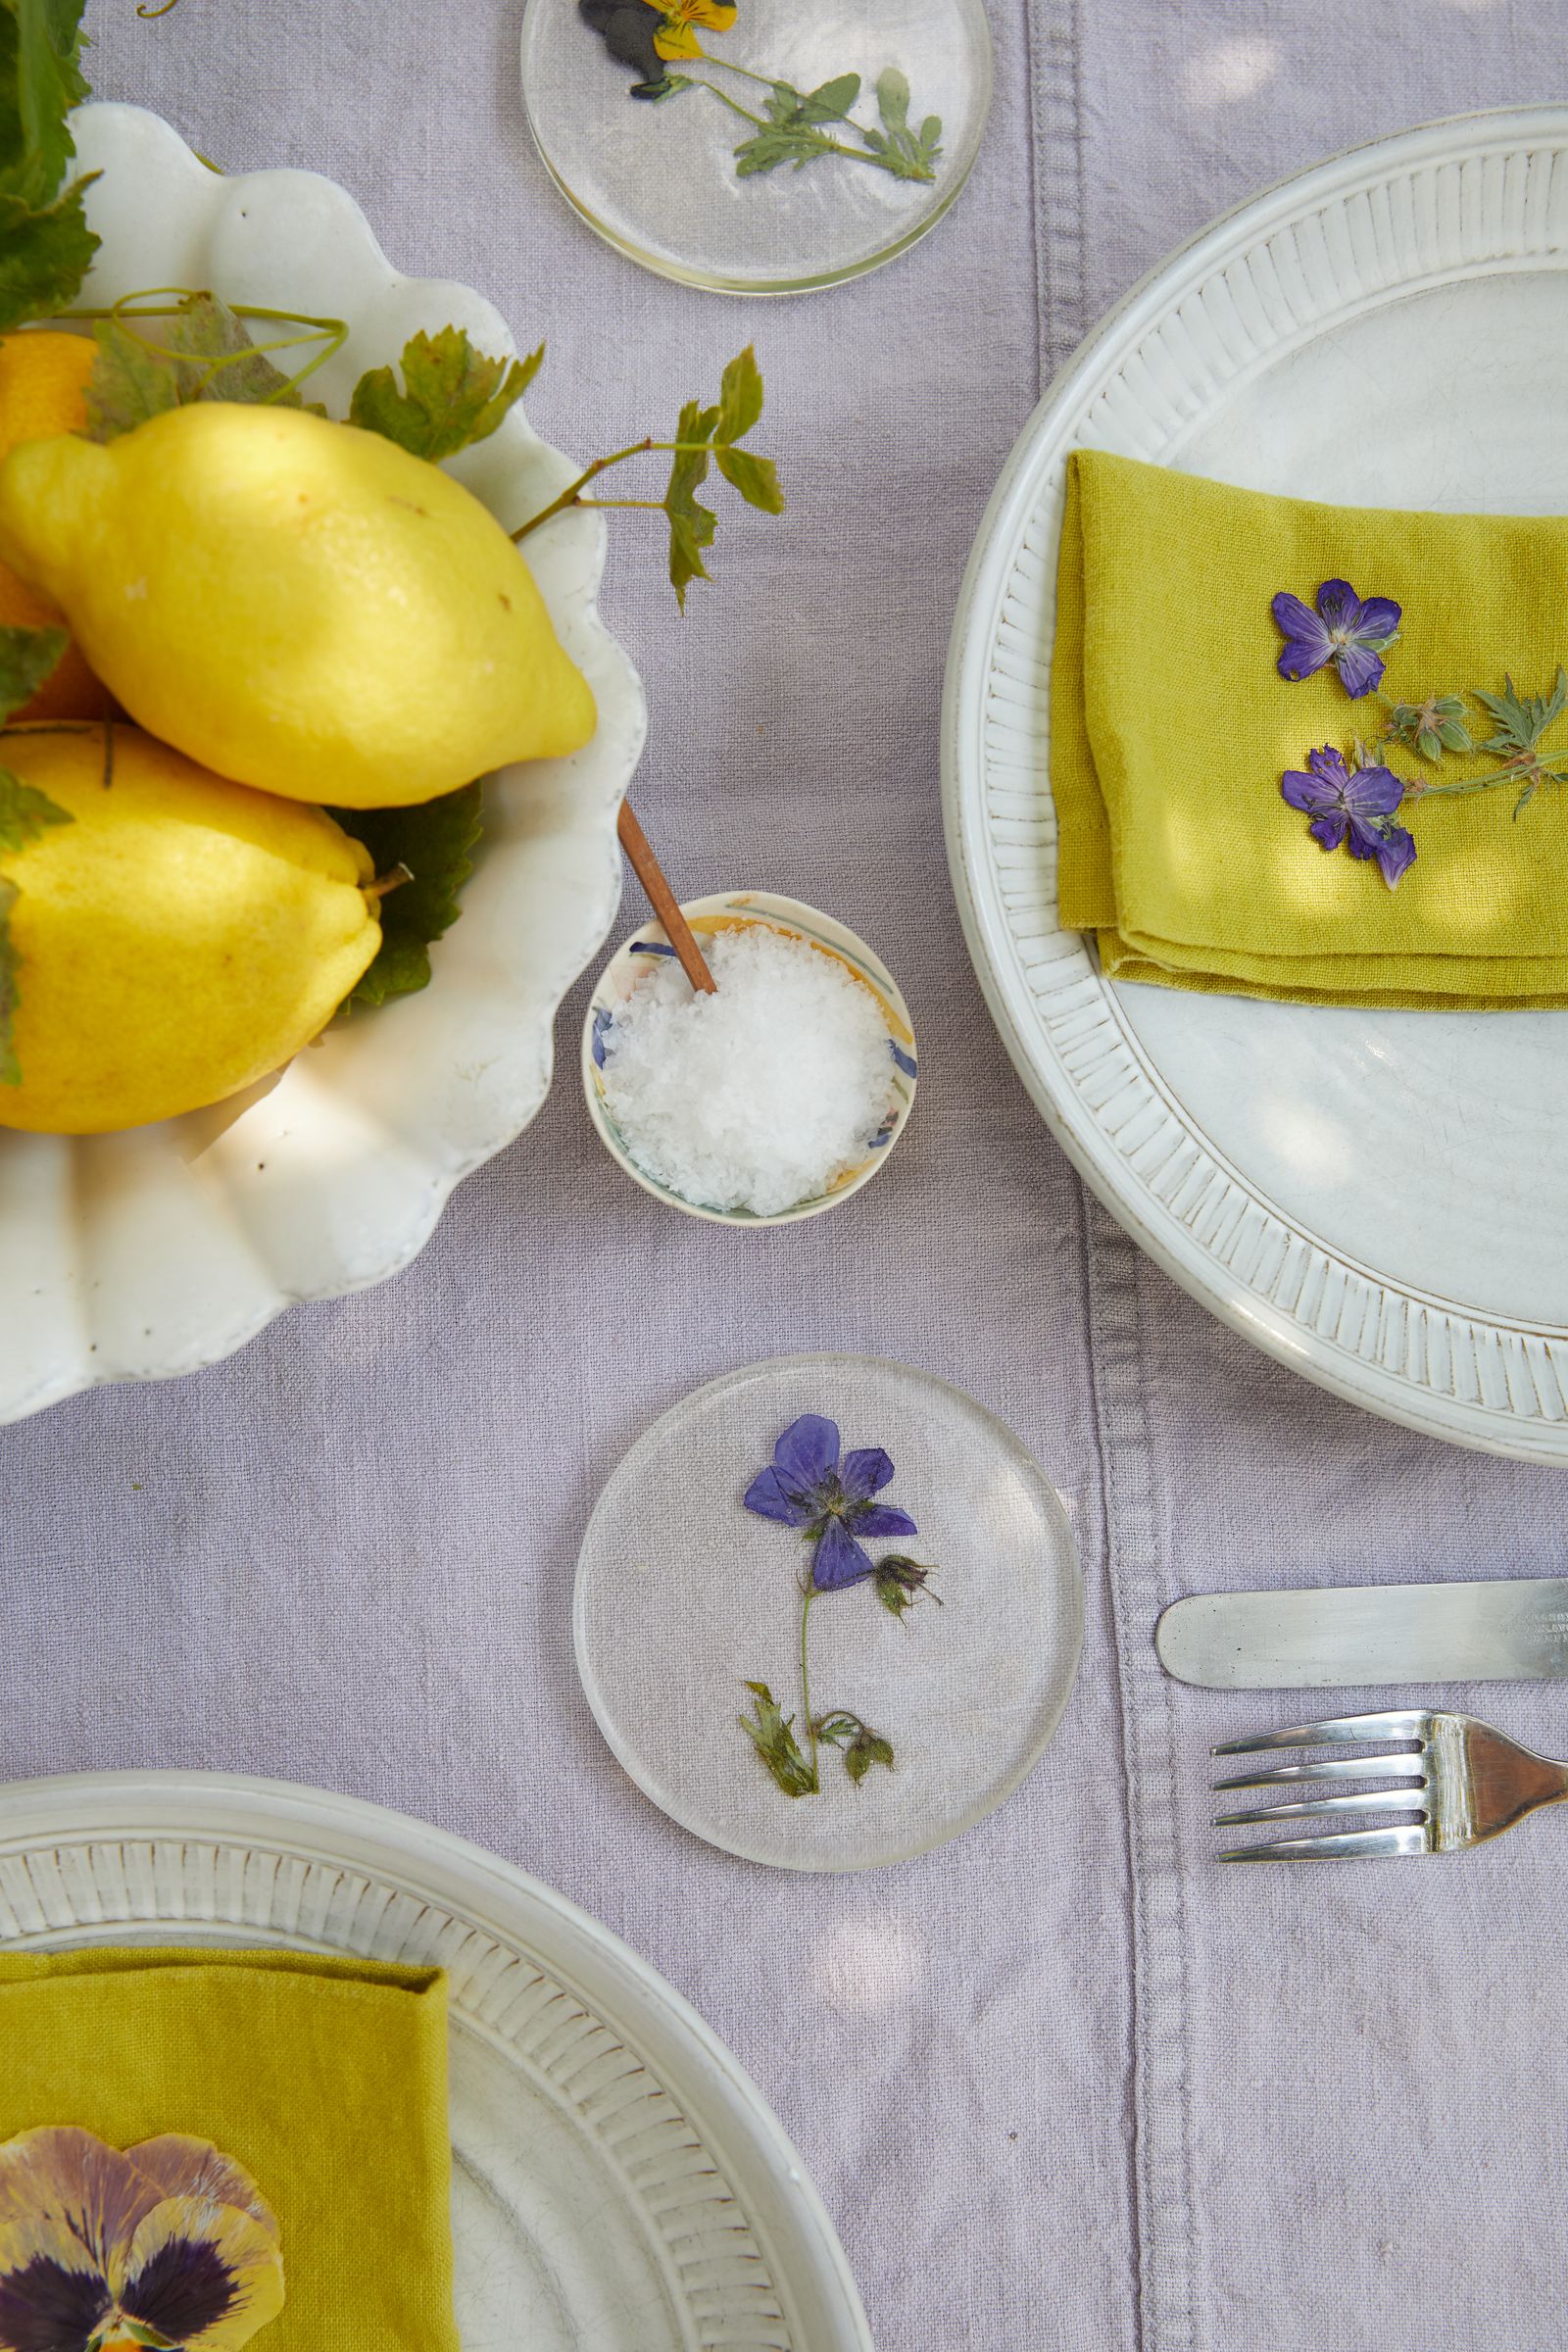
Pressed-flower coasters can be made at home by placing a single pressed flower into a silicone coaster mould and care-fully pouring over clear epoxy resin, then leaving it to set overnight. Clear resin can be tricky to get right, the process involves meticulous preparation and accurate measuring. We recommend buying a crystal-clear epoxy resin kit, which will come complete with measuring cups, stirrers, and protective gloves. Crucially, kits come with clear instructions on how to mix the resin safely. When making our own coasters, we once mixed too much, not realising epoxy resin is sensitive to both temperature and volume, at which point our colleague Scarlett came hurtling down the cobbled yard clutching a black plastic container at arms’ length, smoke billowing out of the top and the sides beginning to melt with the heat. If too much of the resin and hardener are mixed together at the same time it can create an “epoxy exothermic reaction,” where energy releases in the form of heat as the mixture catalyses. Quite dangerous when caught off guard! Despite this mishap we have had successes; if you follow the instructions carefully and take care when preparing your materials, the results can be absolutely stunning.
If you don’t fancy mixing your own resin, an easier way to make pressed-flower coasters is to place a single flower between two clear glass or acrylic discs-you can buy acrylic coasters online-fixing the two layers together using striped grosgrain ribbon stretched and glued around the edge.
Christmas crackers

Sometimes the best presents come in the smallest packages. We sourced these pre-cut craft-paper crackers online for our Christmas table. The design is fuss-free and offers a plain surface to decorate with pressed flowers and personalise with calligraphy. When choosing your pressed flowers, hold each one between your thumb and forefingers and gently flex the stem to make sure it will bend without breaking. Some flowers will be more suited to a curved surface than others. Hellebores are the obvious choice as not only will they will be flowering at Christmas time, they also make excellent pressings, as do astrantia and butterfly ranunculus.
First place the flower where you want it to go, marking the position lightly with pencil, if you like. Write the recipient’s name now and let the ink dry before affixing the flower. Apply a thin layer of clear glue (we use Mod Podge) to the back of the flower head, the stem, and any leaves using
a fine paintbrush, then carefully fix to the cracker. Leave for twenty-four hours for the glue to become touch dry.
Once glued, the stems can have a tendency to unstick when you bend the cracker into shape; if this happens, apply a touch more glue and a strip of masking tape across the bottom of the stem to hold it in place. Or simply decorate with just the flower heads and leaves. Tie a short length of velvet ribbon around the joins once you’ve filled the cracker to finish off your design.
Glass bauble decorations

We adore these elegant glass tealight holders, which can be adapted to make pretty decorations for all sorts of occasions. Decorate with hydrangea florets and hellebores to hang over your Christmas table or on your Christmas tree, or apply pressed “tête-à-tête” narcissi to the glass for an Easter decoration. Here we’ve used our favourite tiger-eye and bi-coloured violas and hung the baubles on willow branches with copper-wire fairy lights for a cosy winter arrangement. We’ve used battery tealights to avoid burning the flowers.
Choose appropriately sized flower heads and apply a thin layer of clear glue to the face of the flower using a fine paintbrush, then carefully fix it on the inside of the bauble. You can apply another layer of glue over the back of the flower as a sealant if you like, but be careful not to go over the edges. You don’t want to see glue smeared onto the glass. Leave for twenty-four hours for the glue to become touch dry before adding your tealights and using.
The Modern Flower Press by Melissa Richardson and Amy Fielding is out now.
More great decoration stories from House & Garden
- 50 stylish living room ideas to copy now
- Farrow and Ball paint colours in real homes
- Small room ideas from the House & Garden archive
- How to hang pictures on walls at home
- Bright bathroom ideas to make a splash
- Hallway ideas to make a great first impression
- Patio, garden decking and terrace ideas
- The best garden furniture stores to help you spruce up
- A guide to the best interiors shops in London
- How to decorate a Georgian house
- The best mattresses to buy for quality sleep


